I have wanted to make some super cute cloth baby blocks with taggies ever since I knew I was pregnant with my first baby… but did I ever get around to it?!?! No, of course not! Well their day has come! Finally, and they are not even for my kids… I’m attending a beautiful mammas baby shower and thought why not try to whip some up for her, and I am in loooove with how they turned out! I’ll show you how these puppies came to be!

I decided to make 6 baby blocks, because in my mind this would be the best number of baby blocks for a small stack. So six baby blocks, each with 6 sides, that means I picked out 36 different patterned fabrics so that no side was the same. Here’s how my piles looked in the beginning. They changed over time as I laid out all my squares. Onto the tutorial!!

HOW TO SEW BABY BLOCKS WITH TAGGIES!!
MATERIALS NEEDED:
- 36 different quilting weight fabrics
- Ribbon
- Fiber fill to stuff your blocks (you could also use 4 inch squared foam)
- Pins
- Rotary cutter or Scissors
- Ruler
- Coordinating thread
- Sewing Machine
- Needle and thread
- Iron (optional)
METHOD:
Step 1: Choose your fabrics! You can choose 36 different fabrics like I did or you could choose 6 and make all of your baby blocks the same. Or you could go crazy and just do whatever you want!!
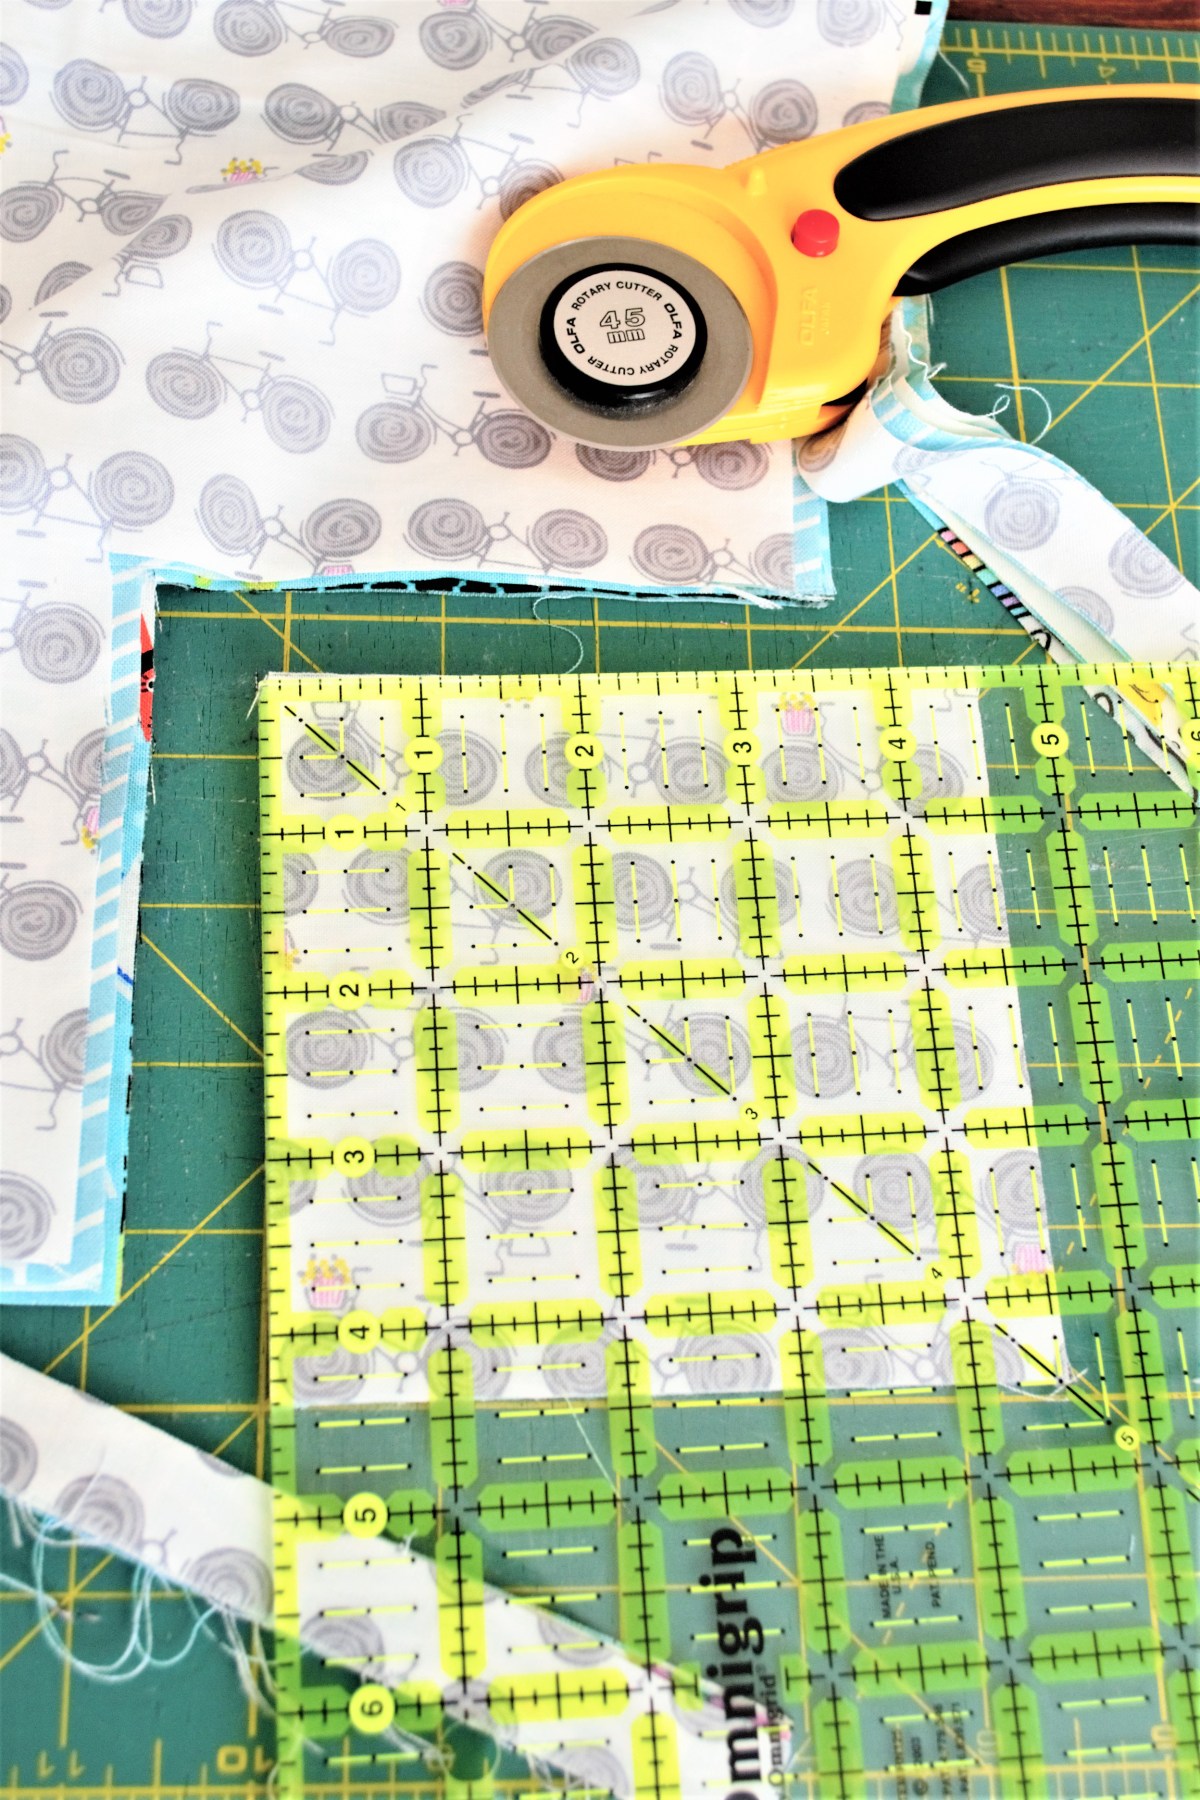
Step 2: Cut your squares! I made my finished baby blocks 4 inches by 4 inches, so I cut 4 1/2 inch squares, to allow for 1/4 inch seams.
NOTE: To make the cutting process quicker I layered all 6 fabrics at a time and cut them together. Like this…


All 36 finished Squares!


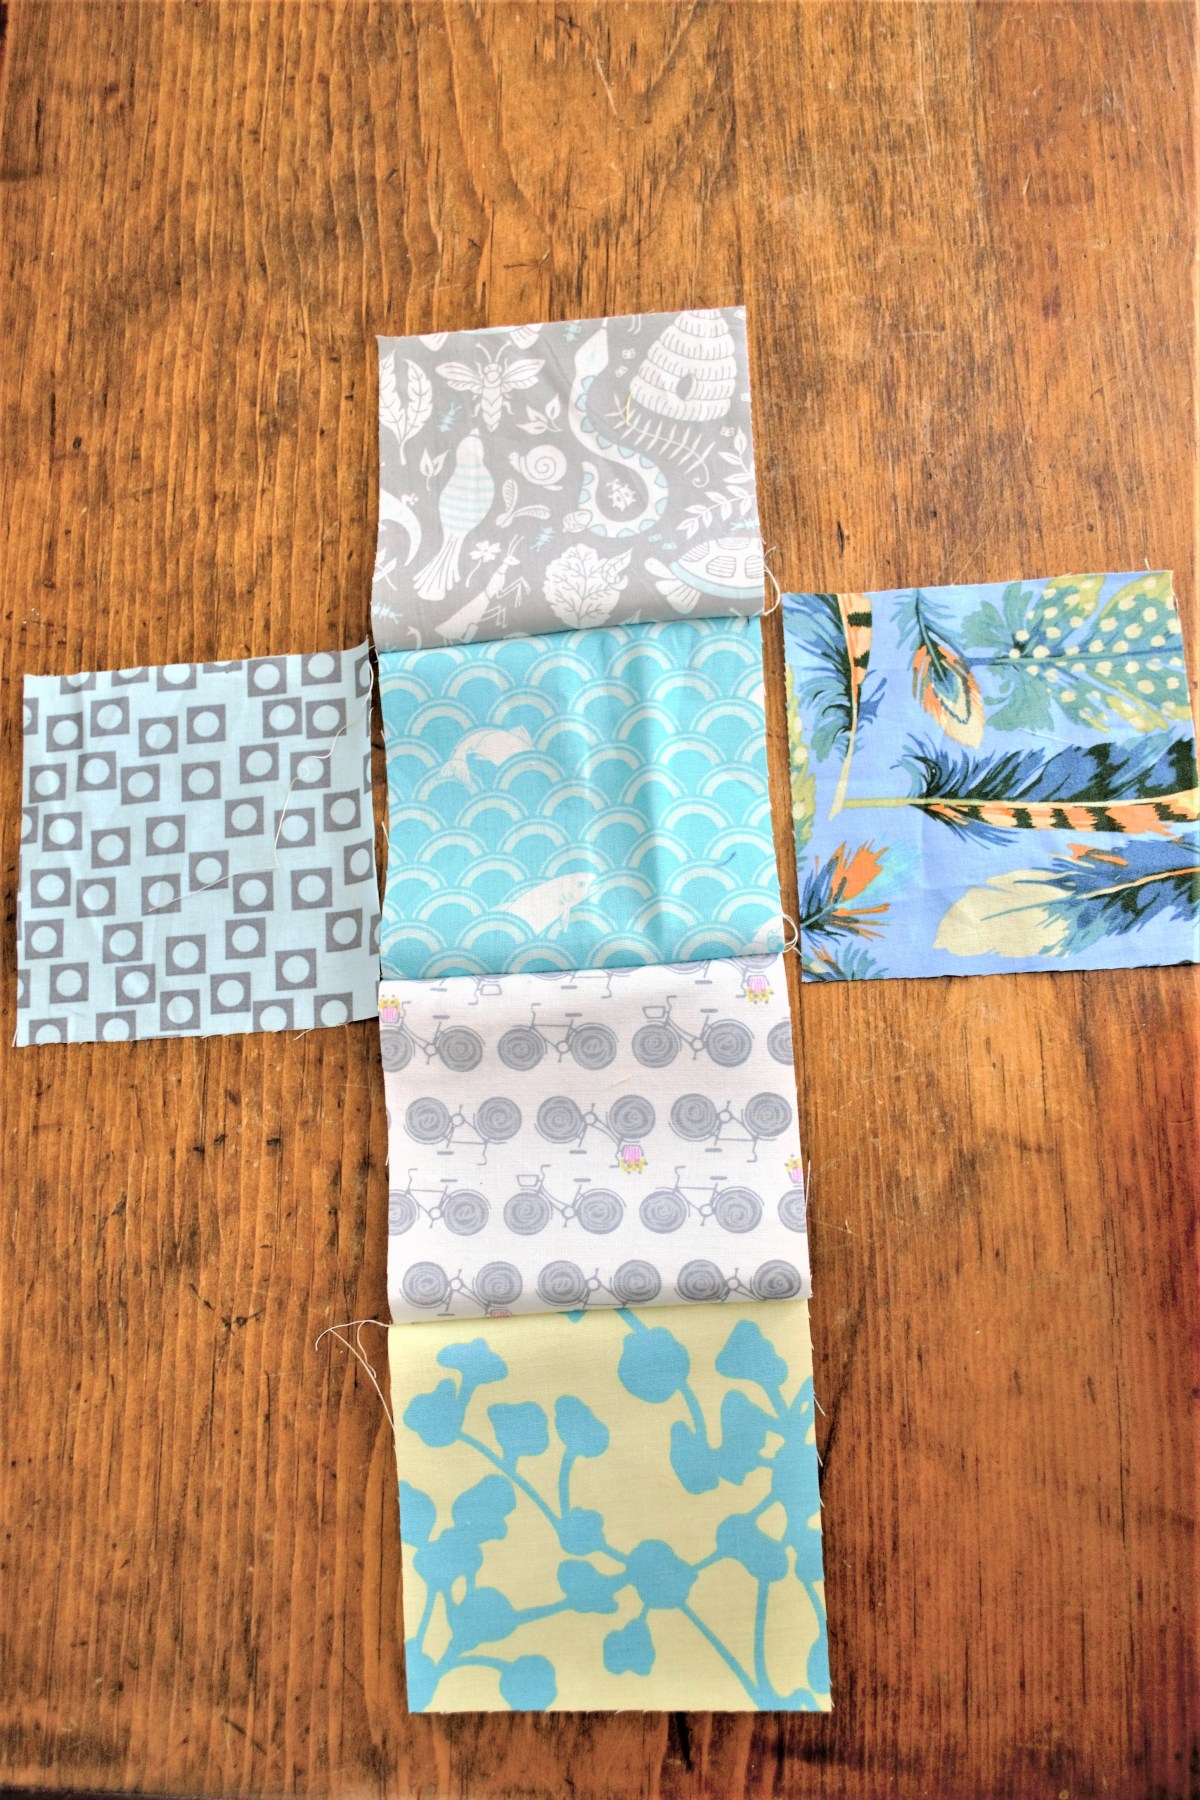
Step 3: Lay out your squares into cross like shapes. Like this… This is when I switched around some of the fabrics in to a pattern more to my liking.


Step 4: Stitch your squares together!
NOTE: start sewing 1/4 of an inch from the beginning and stopping 1/4 inch from the end to allow more movement of fabric when sewing these edges to the sides of your baby block!!
- Start by stitching the first 4 squares together. Like this…

Step 5: Cut out 2 inch long strips of ribbon. I cut 18 strips of ribbon, to allow for 3 taggies per block (you can do more or less, it’s totally up to you).

Step 6: Pin the taggies to your block. Like this…
NOTE: You can pin your taggies to any side of the block. I made 6 baby blocks with taggies in all different spots.

Step 7: Sew the side squares of fabric to the 4 you already sewed together. leaving 1/4 inch unsewn at each end. Like this…

It should look something like this… Note the ends of the fabric are not sewn about 1/4 inch!!

Step 8: Start sewing the sides of your block! Like this…

Then like this…

Step 9: Then sew the top of your baby block. Like this… Remember to leave one side open to be able to stuff the baby block.

Step 10: Repeat previous steps 5 more times! You should have 6 baby blocks that look something like this…

Step 11: Stuff your baby blocks with fiber fill.


Don’t forget to rub all the fiber fill on your face first! Like this…

I stuffed the blocks till the were semi firm, and so no corners were sinking in.

Step 12: Hand stitch the baby blocks closed using an invisible stitch!
This is actually the first time I have ever hand stitched anything, and I had no idea how to do it. I looked up an awesome easy to follow YouTube video called “How to Stitch and Invisible Stitch (Tutorial)” to teach me the invisible stitch. This stitch is so fast and easy that I’ll be using it again and again to finish my sewing projects in the future.

DONE!!!


I am so happy with how the baby blocks turned out!! I think I’ll be making a bunch more because they are super quick and easy to create! Maybe I’ll even make some for my own kiddos. If I have another babe?!?! Not pregnant!! and don’t plan to be for a bit…But maybe one day!
I was thinking that these baby blocks could be customize to fulfill your own baby block dreams, such as adding some kind of a noise maker inside the baby blocks. Options for this could be…
- a bell
- a squeaker
- crinkle material
The Taggies themselves can also have multiple purposes such as:
- a way to connect the block to other toys or together
- a way to hang it from in a car seat
- to hang as ornaments
- for the babes to chew on
The baby blocks can also be very customizable by:
- appliqueing letters or numbers on the side (IDEA: Each block has one letter of the new babies name?)
- appliqueing fabric photos on the sides
- making them any size you want
- using different textured fabric to stimulate touch
As you can see these baby blocks are very customizable. I look forward to making some more for friends and family. Maybe next time I’ll try appliqueing a name on the side or putting a noise maker inside the baby blocks. Until next time, enjoy making homemade gifts for the babies in your life and enjoy creating beautiful things!
XO JCL
P.S. Check out some more of my baby sewing projects here!
P.P.S. Items like this ones used in this tutorial can be found below. Just click on the photo of the product. Thanks so much!


I loved your blog, and am so enjoying making the building blocks. So often something can seem simple but doesn’t turn out right but you’ve put just the right amount of detail in the instructions. I am a great grandmother and have done lots of sewing in my lifetime but sometimes you need to to go back to basics and these little blocks are just right for me and my little great grandson. Thank you so much !
I’m making these as a Christmas gift for 9 month old daughter and 3 month old nephew. They are almost done and look fantastic! I can’t wait for them to play with the blocks. They were easy and quick to make. Thanks for the thorough instructions and photos. I plan on making another set of blocks as a baby gift.
Thanks so much Christine! This made my day. I love to hear peoples success stories about creating something awesome. Thanks so much for sharing! Have an awesome day!
Very cute! How do you work with y-seams?
Thanks so much Darcy! Great question! When working with a y seam (which is where there is corner in your sewing project where 3 different fabrics meet up) always make sure to start and stop your stitching 1/4 inch away from the beginning and end of the side of the block you are working on. There is some moving around of the fabric as you line up the 2 edges that are to be stitched together (remember to leave 1/4 unstitched at the beginning and end of your stitches, then fold your fabric so that the next edges are lined up to stitch and repeat. LOL. I mention it very briefly in step 4 and step 7. I hope you understand my explanation. If you need more assistance I’d love to answer more questions! X
This is a great do it yourself guide! I am a big fan of these type of blog posts because I get to learn new things in few minutes, for free! I like how detailed your pictures are, so it’s almost impossible to go wrong! I will try it in 2018!
Thanks so much Gabriela! I’m so glad you appreciate the tutorials. I love making them. I’d love to see what you create in the new year. Happy holidays! ❤️
I love your creativity and how you break it down so people like me can do it too! I have nominated you for The Blogger Award! You can see my post here http://everydayabovedirt.com/blogger-recognition-award/
Thank you so much for the blogger award nomination Lindsey! And thank you for noticing that I really break my tutorials down. I really try to make it easy for people to create too! This means a lot to me! Much love to you on your blogging adventures too! BIG HUG!